Info Sidebar
The Info Sidebar opens alongside the full-screen viewer and shows the metadata of the currently displayed picture or video. It is a lightweight alternative to the Edit Dialog when you want to inspect or quickly correct individual fields without leaving the viewer.
Permissions
Users without edit rights, e.g. viewers see a read-only version of the sidebar that omits empty fields. Guests, and visitors opening a share link, see a further limited subset of the metadata.
Opening the Sidebar
Press Ctrl + I while a picture is open in the full-screen viewer, or pick "Toggle Info Sidebar" from the viewer menu. The same shortcut closes it again. The sidebar position is remembered across page reloads, so it stays open until you explicitly close it.
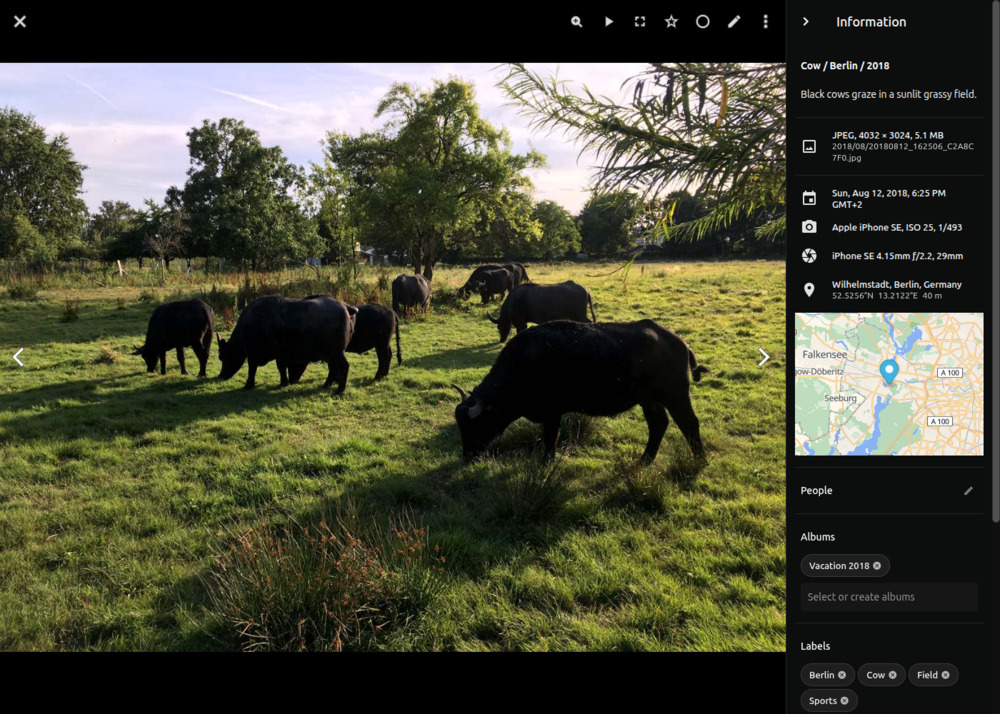
What It Shows
The sidebar includes the most frequently used metadata fields, as well as assigned albums, labels, and people:
- File: Path and filename of the currently displayed media file.
- Camera: Make and model, lens, ISO, exposure, focal length, and f-number.
- Description: Title, caption, artist, copyright, and license.
- Albums: Clickable chips that link to the matching album.
- Labels: Clickable chips that link to the matching search results.
- People: Clickable chips that link to the matching search results.
Clicking a chip will open the matching album or search results in a new tab, allowing you to browse the collection while staying in context.
Editing Metadata
Click on a metadata field, such as Caption, to edit it. Some fields can be edited in place, while others open a dialog. Press Escape to cancel or confirm to save your changes. Note that invalid values cannot be saved and will cause an error message to appear.
Editing People & Faces
The Info Sidebar provides the same face-management actions that are available on the People tab of the Edit Dialog, and is the only place where you can manually mark a face that PhotoPrism missed during automatic detection.
Click next to People to enter edit mode, which displays all existing face markers on the image and unlocks the change, remove, and manual-marker actions below. Click when you are done. Edit mode is not required to assign a name to an existing unnamed face.
Assign Names to Faces
- Open a photo in the full-screen viewer and open the Info Sidebar by pressing Ctrl + I.
- Click the name field next to the face you want to name.
- Start typing a name; existing people are suggested as you type.
- Press enter to confirm.
Change People Assignments
- Open a photo in the full-screen viewer and open the Info Sidebar by pressing Ctrl + I.
- Click next to People to enter edit mode.
- Click next to the person you want to change.
- Type a new name and press enter, or leave the field empty.
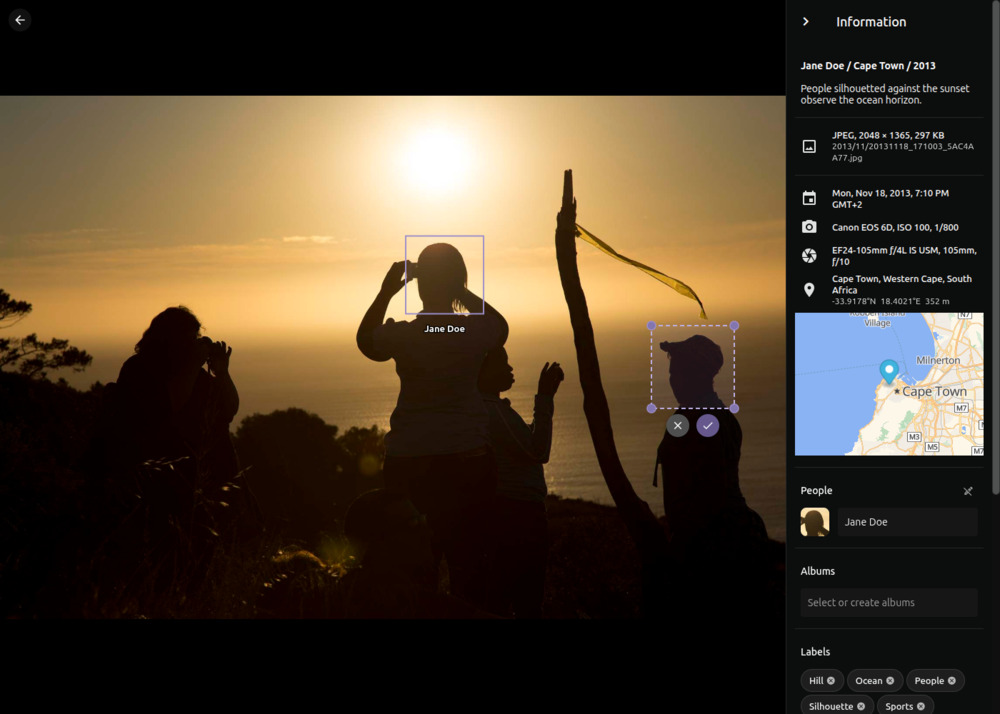
Manually Mark a Face
- Open a photo in the full-screen viewer and open the Info Sidebar by pressing Ctrl + I.
- Click next to People to enter edit mode.
- Drag on the image to draw a rectangle around the missed face.
- Click in the confirm pill to keep the new marker.
- Type a name in the new row that appears under People, then press enter to assign a person.

Remove Faces
Like on the People tab of the Edit Dialog, only unnamed face markers can be removed.
- Open a photo in the full-screen viewer and open the Info Sidebar by pressing Ctrl + I.
- Click next to People to enter edit mode.
- Click the face marker on the image.
- Click in the confirm pill to remove it.
