Tailscale VPN
Tailscale is a third-party mesh VPN. If you run into issues with their service or client, contact the Tailscale community because we cannot debug vendor-specific problems.
Tailscale builds a private WireGuard® network between your devices, so you can reach PhotoPrism over an encrypted tunnel without exposing port 2342 to the public internet. The steps below cover the most common home-lab scenario (Linux server + mobile/desktop clients) and highlight optional ACL rules that keep untrusted nodes isolated.
1. Create a Tailnet and Install the Client
- Visit tailscale.com and click Use Tailscale.
- Sign up with Google, Microsoft, GitHub, Apple, or an email address. This creates a tailnet tied to your identity or organization.
- Install the client on every device that should access PhotoPrism:
- Linux server (PhotoPrism host)
Generate one-time auth keys in the Admin Console or authenticate interactively with
curl -fsSL https://tailscale.com/install.sh | sh sudo systemctl enable --now tailscaled sudo tailscale up --accept-dns=true --authkey tskey-auth-XXXXXXXXXXXXXXXXsudo tailscale upand a browser login. - Mobile / desktop clients: follow the platform downloads for Android, iOS, macOS, Windows, etc. Sign in with the same account and approve each device when prompted.
Tip
Enable MagicDNS in the Admin Console so every node gets a friendly name like photoprism.your-tailnet.ts.net. This avoids memorizing 100.x.y.z IP addresses.
2. Verify Connectivity
Once the PhotoPrism host and your client devices are connected, they appear in the Machines list:
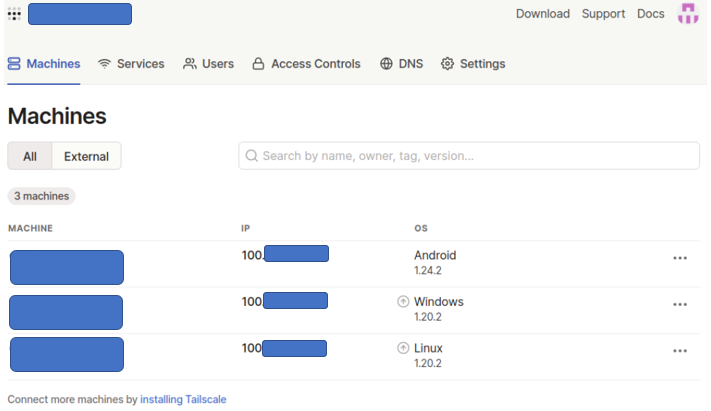
Each device receives an auto-assigned 100.x.x.x address (sometimes shown as 100.64.0.0/10). Use that IP or MagicDNS name plus PhotoPrism’s port (default 2342) to reach the UI:
http://photoprism-host.ts.net:2342/
# or
http://100.120.34.10:2342/
If PhotoPrism runs behind a reverse proxy, continue to access it through the proxy port (for example https://photos.ts.net/).
Warning
Make sure your firewall allows inbound connections on interface tailscale0 (Linux) or the Tailscale adapter (Windows) for the PhotoPrism port. Otherwise the VPN will come up but requests to port 2342 will fail.
3. Optional: Share Devices or Use Funnel
- Device sharing lets you invite individual Tailscale users to a single machine without adding them to your whole tailnet. Use the ••• > Share button next to a device in the Admin Console.
- Tailscale Funnel exposes a service to the public internet via Tailscale’s relay. Only enable Funnel if you understand the implications; at that point PhotoPrism is publicly reachable and you still need HTTPS plus authentication. For private family use, stick with the default private tailnet model.
4. Restrict Access with ACL Tags
If you host PhotoPrism in the cloud but only want outbound access from your desktop (not the other way around), create Access Control Lists (ACLs) that tag and isolate nodes. The example below creates two tags (lan and cloud) and prevents the cloud server from initiating connections to your LAN machines.
- Open the ACL editor and add tags + rules:
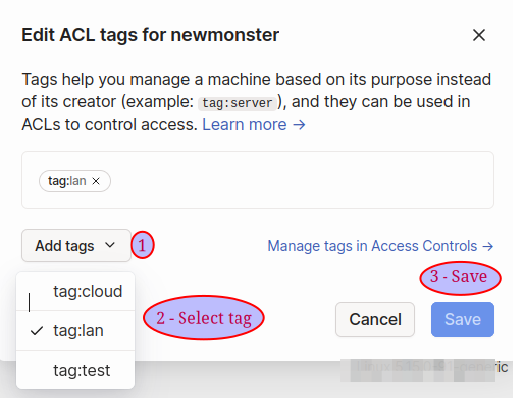
{ "tagOwners": { "tag:lan": ["autogroup:admin"], "tag:cloud": ["autogroup:admin"] }, "acls": [ { "action": "accept", "src": ["tag:lan"], "dst": ["*"] } ] } - Go to the Machines page, open the ACL tags dialog for each device, and assign
tag:lanto desktops/laptops andtag:cloudto the cloud VM.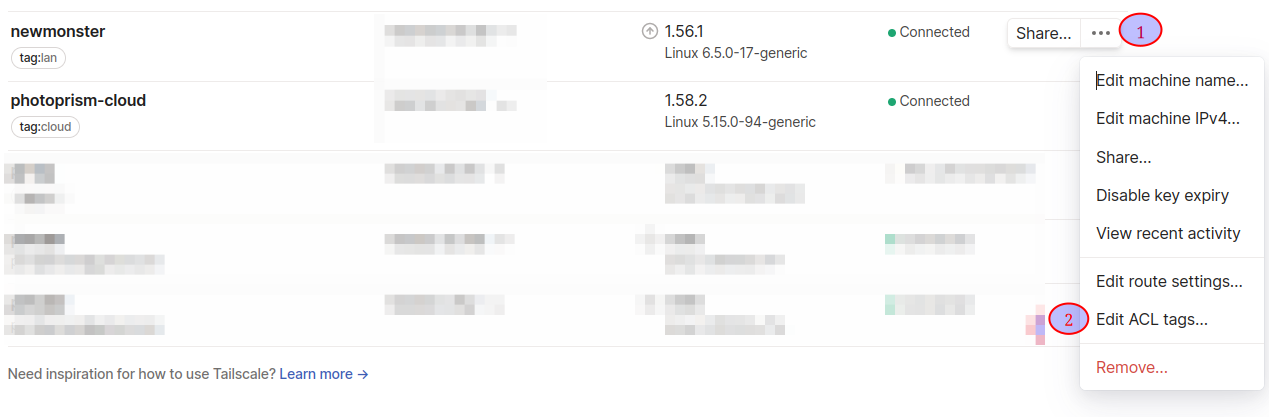
- Test the policy:
- Access PhotoPrism on the cloud VM from your tagged
landesktop (create an album, add labels, etc.). - SSH from the desktop into the cloud VM — should work.
- Try to ping or SSH from the cloud VM back to the desktop — it should fail because no ACL rule allows it.
- Access PhotoPrism on the cloud VM from your tagged
Note
You can stack additional rules to permit maintenance traffic (for example, allow the cloud VM to reach your monitoring node) while still blocking everything else.
Help improve these docs! You can contribute by clicking to send a pull request with your changes.